

Animation can add a little spark of life to any project, it doesn’t take much work to take flat graphics and transform them into animated elements — And best of all, you don’t even need to leave Photoshop to achieve this. Everyone likely knows that Photoshop is a powerful graphic design tool, but you may not know that it also includes a handy feature that gives you the ability to add basic animations to your graphics.
You don’t get very many animation options inside of Photoshop, but the few options you do have are perfect for quickly creating fun little GIFs, loops, and stories in minutes. The simplicity of these tools actually works to your advantage compared to using a more traditional method to animate or edit video.
Photoshop Video Timeline
The ability to animate inside of Photoshop comes thanks to the “Timeline” feature. Whilst this might look similar to something you may have already seen in video editing software, don’t be expecting too much from this tool, it is quite basic and it essentially functions as a simple way to add Keyframes to your graphics, allowing you to move, scale, spin, fade and re-style them over time. Thankfully, this is all we need in order to create some simple GIF animations.
To launch the Timeline, it’s a good idea to make sure that all of the elements that you want to animate are already in your document, then go to Window > Timeline.

This will bring up the Timeline panel inside of Photoshop, then you hit the Create Video Timeline button. (If your panel says Create Frame Animation instead you can use the drop-down to change it to Video Timeline instead.)
Once we have the Timeline feature enabled we need to understand at how to add simple animations using Keyframes.
What Are Keyframes?
Keyframes essentially allow you to set points in time where you want certain parameters to change. The closer these keyframes are together on your timeline the quicker they happen, the further away they are, and the slower the change happens.
In Photoshop, and most animation or video tools, when you add new Keyframes they appear as little diamonds on your Timeline. Each diamond signifies a change in parameter at that time.
To add a Keyframe you need to decide which parameter you wish to animate via the Timeline panel, it could be Scale, Opacity, or Style, and then click the stopwatch icon next to it in order to enable Keyframes and animations on that parameter.

Opacity Animations
For example, if we used the ‘Opacity’ parameter, you could add one Keyframe at the start of your timeline with 100% Opacity. Then move forward in time and add another Keyframe at the end of your timeline with 0% Opacity. Now when you hit play, Photoshop would automatically fade your chosen graphic from 100% to 0%, between your Keyframes which act as the ‘trigger’ for the opacity change. That would look something like this:

Position Animations
The same thing applies to a number of parameters inside of Photoshop, so you could use a Keyframe to set the starting Position for a graphic on the left side of your canvas, and then move your graphic to the right side by the end of your timeline with another Keyframe. Photoshop would then move the graphic for you, creating the necessary movement and motion on the frames in-between your main Keyframes. That would look something like this:

You can see already how simple it is to take any existing graphics and add some basic movement or animation to them. Of course, this takes some time, patience, and practice to get right, but simply by setting up a few Keyframes is enough to get some motion into your work.
Rotation Animations
When it comes to animating rotation in Photoshop it is important that you first convert the layer to a Smart Object. In simple terms a Smart Object allows you to apply new styles and effects to a layer while retaining the ability to edit or remove those effects at any point, without the original image being affected. Without first converting to a Smart Object you might find it impossible to reply rotations using the Position Keyframes.

So to animate a full spin, for example, you would first Select Your Layer > Convert to Smart Object. Then go down to the timeline panel, make sure your time scrubber is at the start of your timeline, then add a new Keyframe to mark the start of your animation. Then Move to the Middle of your Timeline, add a new Keyframe and Rotate your graphic 180 degrees. Finally, you should Move to the End of your timeline and Rotate the graphic another 180 degrees, completing the full 360-degree spin. Now when you hit play Photoshop will create a satisfying spin between your keyframes and better still this spin should loop perfectly.
You may notice that when you convert an object to a Smart Object the ‘Position’ parameter in your Timeline Panel now displays as “Transform” instead, this is exactly what we want to see.
Scale Animations
When it comes to changing the scale of your graphics over time, once again we need to look at using Smart Objects. Without using Smart Objects you won’t be able to change the scale objects over time.

So for example, if we wanted a graphic to get smaller over time we would first select the layer in the Layers Panel, then Convert to Smart Object. Then in our timeline panel, scroll to the start of your timeline, Add a New Keyframe to capture the current size of your item, then we scroll to the end of the timeline and Add a New Keyframe, and resize your object so that it is smaller. Now when you hit play you will see that Photoshop will smoothly animate the size change over time.
Learning to Loop
If you want to create looping animations, all you need to do is make sure that the start and end of your animations are using the same parameters. This will ensure the end of your animation will match the beginning of your animation, so once the loop begins to play back everything is back in the right place.

One quick way to do this is to Copy the Starting Keyframe and Paste it at the End Frame of your timeline too. Then you can scroll to the mid-way point of your timeline to apply your rotation, scale or positional changes.
Creating An Animated Instagram Story
Now that we know four basic animation types in Photoshop, we can animate the scale, rotation, opacity, and position of any element that we want. While there are more types of animation that you can explore and experiment with inside of Photoshop, these four key animations are enough to get you started with creating your own animated GIFs from any existing graphics you have.
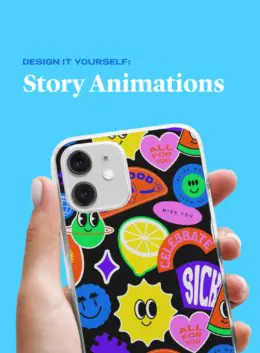
Using the same principles that we’ve talked about above, let’s take a pack of graphics and create a fun, animated Instagram Story out of them., just by using just these 4 basic animations inside of Photoshop. For this example, we will use the Retro Cartoon Label Pack by DeDrawStudio:
Design Tip #1: Compose Your Scene Before Animating. When animating a more complicated scene it’s usually better to compose the static version of the scene first. Place your items roughly where you want them to sit (even if you are going to animate them later) and place every other element on your canvas that you are going to work with before you start animating.

Design Tip #2: Convert Individual Graphics to Smart Object
Anything that you plan on animating can now be converted into a smart object. As we talked about before this allows you to animate scale and rotation in a more predictable way, but there’s no harm in Converting all layers that you want to animate to a Smart Object before working with them on your timeline anyway.
Design Tip #3: Add Looped Animations
Looping your animations will add a satisfying, smooth feel to your work. We’ve explored some basic animation types and we’ve learned how to loop them, so lets’ apply that knowledge to our example graphics and see what we get.

As you can see, the whole scene is brought to life by just applying some basic animations. For the sparkles around the text, I just animated the opacity to make them appear to flicker. For the flower in the top left, I simply rotated the graphic 360 degrees and looped it. The “neat” text at the bottom appears to scroll forever, I simply duplicated the layer and animated the position of it moving from left to right, and then with the other stickers I simply applied some basic scale or movement to them.
Design Tip #3: Exporting Your Videos or GIFs.
In our example, I will be exporting our Instagram Story template as a video file, so we simply need to go to File > Export > Render Video. Then set the file format that you wish to save it as and give it a name (I recommend .MP4 format.)

Or if you wish you could export an animated GIF by going to File > Export > Save for Web, then selecting GIF. Make sure you look for the loop setting and Set‘Loop’ to‘Forever.’
Time To Get Creative
Now that you are familiar with the basics, you should be able to take any graphics that you have and get them moving, jumping, or spinning with just a few clicks. Mastering the movements and animations will come in time, but having the confidence to play around with Keyframes and Loops is the key to creating great animations!